Ice Fishing for Beginners — Setup, Species, and First-Trip Checklist
Ice fishing has gotten complicated with all the conflicting advice flying around. Every forum thread contradicts the last one. Every YouTube video skips something critical. I started ice fishing seven years ago after a coworker — Greg, an unremarkable guy who ate the same turkey sandwich every Tuesday — mentioned he’d pulled twenty bluegill through a hole in two hours on a Wednesday morning. That sounded made up. It wasn’t. But I nearly turned it into a disaster by skipping the part where you actually check whether the ice will hold you.
This article includes affiliate links. We may earn a commission at no extra cost to you.
This guide exists because I needed it back then. Most articles chop ice safety, technique, and gear into separate pieces scattered across three different websites, leaving you wondering whether a hand auger is even worth hauling out to a frozen lake at 5 a.m. Everything here lives in one place. Safety comes first — not as a formality, but because it genuinely is. Then the practical stuff that actually gets fish in the bucket.
Ice Safety: The Non-Negotiable First Section
Probably should have opened with this section, honestly. Beginners want to skip straight to “what fish do I catch and how fast,” which is understandable. But ice safety decides whether you catch fish or become a news segment. No bluegill is worth hypothermia. No perch is worth drowning.
How Thick Is Thick Enough?
Four inches. That’s the floor for walking on ice safely. Not three and a half. Not “looks solid enough.” Four inches of clear, hard ice holds an adult. Two inches holds nothing. Three inches is still a gamble you shouldn’t take. The math is blunt.
But what is “safe ice,” really? In essence, it’s four-plus inches of clear, hard ice formed from freezing water — not the white, compressed stuff that formed from snowpack. But it’s much more than that. A single lake can have four inches on the main basin and two inches near an inlet where current keeps things moving. You check thickness constantly. Not once at the shore and never again.
Bring a chisel or a cordless drill with a long auger bit. Walk twenty feet out and punch a hole. Measure straight down — none of this eyeballing from the side. Then walk another thirty feet and check again. I’ve personally seen two spots ten feet apart differ by nearly two inches. That gap matters enormously.
The Buddy System Saves Lives
Never fish alone on ice. Full stop. If you break through, you’ve got maybe fifteen minutes of useful consciousness before cold water does what cold water does. A buddy on the surface with a rope or even a long branch is the difference between a terrible afternoon and an obituary. Ice fishing is social anyway — it’s one of the things that makes it endearing to us cold-weather types. Bring a friend, drag a family member along, or find a local fishing club.
Both of you should carry ice picks. These are cheap steel tools — ten to fifteen dollars on Amazon, usually sold in pairs — with handles you grip while your arms are dangling in freezing water. The picks catch ice and let you claw yourself out. Sounds grim. It’s actually straightforward once you’ve practiced it once on dry land. Non-negotiable item. Don’t make my mistake of leaving them in the car “just this once.”
When NOT to Go
Don’t fish on new ice in early winter before it’s hit that four-inch minimum. Don’t go out after a warming stretch or heavy rain. Avoid lakes sitting near moving water, dams, or outlets — current keeps ice dangerously thin in ways you can’t always see. Don’t fish at night during your first season.
Dark ice — where you can see water showing through — usually means thin ice. Soft ice that compresses underfoot means leave immediately, not in a minute. Pressure ridges where ice has buckled and refrozen are stress points. Walk around them, not across.
Essential Gear Checklist (Budget-Friendly)
While you won’t need eight hundred dollars in gear to start ice fishing, you will need a handful of specific items that actually matter. I spent one hundred seventy dollars on my first setup — some of it used, some bought new from a bait shop in Duluth that smelled aggressively of minnows. I caught more fish that first season than the following year when I’d tripled my investment. Beginner setups work fine. Expensive rigs are for people who’ve already figured out what they’re doing.
The Rod and Reel
Ice rods are short — two to three feet — because you’re jigging straight down through a hole, not casting across a lake. A spinning reel in the 500 to 1000 size class works perfectly. Ultralight bass rods function too. The main thing you want is smooth drag that doesn’t stick every few seconds.
Budget estimate: forty to eighty dollars new. Or find used Shimano Sienna or Abu Garcia combos on Craigslist for fifteen to thirty dollars. These things last forever with basic care.
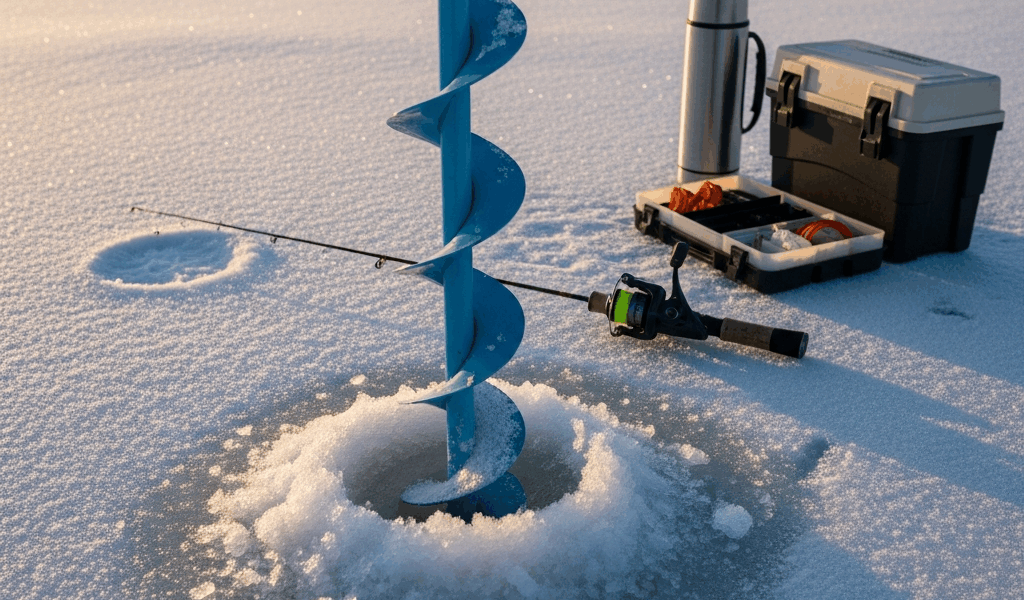
The Auger
This is where first-time buyers freeze mentally — no pun intended. Hand auger or power auger? Hand augers cost thirty to sixty dollars. Power augers start around three hundred and climb from there. The answer is simpler than the forums make it sound: start with a hand auger.
A six-inch hand auger from Strikemaster will drill through fourteen inches of ice in roughly four minutes. For panfish on your first trip, that’s completely fine. Drill two or three holes, fish each one, move if needed. Power augers come later — maybe year two, if you’re going regularly and local lakes freeze thick. An Ion eight-inch power auger runs around four hundred dollars and saves serious labor on thick ice. Still not essential for someone starting out.
Bucket and Basic Tools
Five-gallon bucket: ten dollars. You sit on it. You organize your jigs in it. You store extra line in it. Genuinely essential — don’t skip it. A skimmer, which is basically a strainer on a long handle, runs about ten dollars and keeps your fishing hole from freezing over while you’re using it. Thermos of hot coffee: free if you own one. Ice picks: fifteen dollars for a pair. Line clippers: five dollars. A small flashlight for early-morning arrivals: ten dollars.
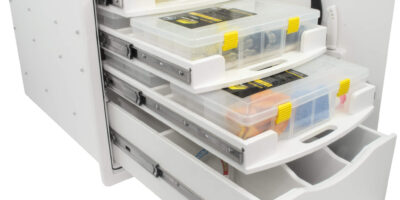
Jigs and Terminal Tackle
Buy a small assortment of ice jigs ranging from 1/32 ounce to 1/8 ounce — lead or tungsten, mostly. VMC, Northland, and Rapala all make solid options that hold up. Figure fifteen to twenty-five dollars for a decent starting selection. Wax worms, the live bait you’ll tip those jigs with, run four to six dollars per container at any bait shop. Each worm lasts through several fish if you’re not reckless about it.
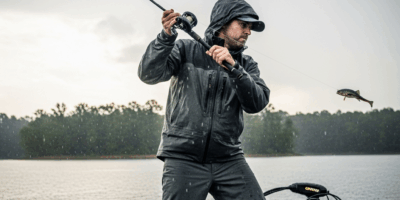
Optional But Nice: Shelter
A flip-up shelter — basically a small portable tent that sets up in under a minute — costs sixty to one hundred twenty dollars. Wind on an open lake is brutal in ways that are hard to fully appreciate until you’ve experienced it. Beginners can honestly skip shelter for trip one. Fish from your bucket on a calm day first. If you hate the cold after that, buy a shelter before trip two.
Total First Setup Cost
Hand auger, rod and reel, bucket, jigs, bait: roughly one hundred twenty to one hundred eighty dollars new. Used equipment drops that to sixty or a hundred. One power auger setup triples the whole number. Start cheap and upgrade only after you know you’re hooked — again, no pun intended.
Best Species for Beginners
Not all fish behave the same through a hole in frozen water. Some are aggressive and, honestly, a little oblivious in the best possible way. Others require finesse and patience that takes seasons to develop. Start with the forgiving ones. Graduate to the difficult ones. This progression takes two seasons, not two days.
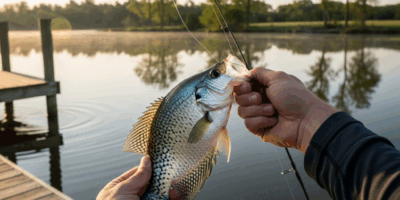
Panfish — Your Starting Point
Bluegill and crappie are forgiving. They school. They hit small jigs without overthinking it. They tolerate mediocre technique from people who are still figuring things out. A beginner with a 1/32-ounce jig tipped with a wax worm can realistically catch ten to fifteen bluegill in two hours on a decent day — and that immediate success matters more than people acknowledge.
Bluegill live in almost every lake with reliable ice cover. They winter in deeper water — eight to fourteen feet, typically — and school tightly enough that once you find one, you’ve found a hundred. Crappie behave similarly. Both species fight enough to feel satisfying but not so hard that you lose half your jigs to the lake bottom in frustration.
Finding them is straightforward. Drill holes at different depths, start at ten feet, and sit for ten minutes per spot. No hits after ten minutes? Move. Bluegill tell you immediately whether they’re interested or not. There’s no ambiguity.
Perch — Medium Difficulty
Yellow perch are trickier than bluegill but still manageable after a few panfish outings. They’re pickier about presentation — a jig moving too fast gets ignored. They school tightly, so you might catch five from one hole and nothing from the next one thirty feet away. They fight harder, which feels genuinely great. And perch fry is, apparently, legendary table fare. Ask anyone from Wisconsin.
Perch run deeper than bluegill — start at fifteen to twenty feet. Same jigging technique, slightly smaller jig sizes, more patience required. Try them after your first two panfish trips, not before.
Walleye and Pike — Advanced Species
I’m mentioning these because you will absolutely want to catch them. Don’t start here. Walleye demand specific presentations, specific depths, and can ignore your jig for hours while appearing to look directly at it. Pike hunt actively, which means constant rod movement, and they’re powerful enough to snap beginner gear without much effort. Both species require understanding structure, migration, and seasonal behavior patterns that take real time to develop.
Year two or three. Not year one. Be patient.
Basic Technique: Jigging for Panfish
Ice fishing jigging isn’t complicated — it’s actually simpler than most warm-water techniques because there’s no casting involved. You drop straight down and move the lure in a way that looks alive. Small movements. Real small. Smaller than feels natural at first.
Setting Your Depth
Drill your hole. Let your jig drop until it taps bottom. Reel up three feet. This puts you above the lakebed without hanging in empty water — fish typically hover just off bottom in winter. If nothing happens after ten minutes, reel up another two feet. Keep adjusting until you find where fish are suspended.
On panfish, most bites happen between three feet off bottom and mid-column. On walleye, they’ll often hit right on the bottom itself. The difference becomes obvious after a few trips.
The Jigging Motion
Lift your rod tip eight to twelve inches. Drop it back down slowly. Repeat. That’s jigging. Not violent. Not fast. Smooth and deliberate. The wax worm does most of the actual attracting. Your job is making the whole thing look like something alive and sinking.
Frustrated by a six-hour stretch of catching nothing my second season, I sat in a borrowed flip-up shelter on a lake outside Two Harbors and finally figured out the thing everyone had been telling me: smaller movements produce more fish. The jig should drift up and settle back down like a worm losing interest in swimming, not like a lure being yanked by someone trying to get their money’s worth. Most beginners jig too hard and too fast, then wonder why the fish scatter.
Reading the Line and Setting the Hook
Bites come through the rod as sensation. A bluegill feels like a gentle tap — almost like a finger flicking the line. A walleye feels like sudden resistance, like the jig got heavy. When you feel weight or that tap, set the hook with a quick upward snap. Not dramatic. Just enough to drive the point home.
Some fish hook themselves on the way up. Others need a deliberate set. You develop the feel for the difference on trip two, maybe three. First trip, just snap upward whenever something feels different.
Your First Trip Plan
Theory meets frozen lake here. This is the actual schedule that produces fish for beginners without requiring years of accumulated knowledge.
Timing and Location
Leave the house before sunrise. Ice fishing produces best during the first two hours of light and the last hour before dark — between those windows, fish slow dramatically and you spend a lot of time staring at a motionless rod. A 6 a.m. arrival means you’re fishing by 7, right when panfish are most active.
First, you should choose a lake within thirty minutes of home — at least if you’re still deciding whether this is even a hobby you’ll stick with. Something public with a plowed parking lot. State DNR websites publish lake maps with depth contours for free. Find a bay or shallower area in the eight-to-fourteen-foot range where panfish typically winter. That’s your spot.
The First Two Hours
Drill three holes in a line, spaced thirty feet apart. Confirm ice thickness at each location before you commit your full weight to any spot. Set your bucket at hole one and get your rod ready.
Drop to three feet above bottom. Jig slowly and steadily for ten minutes. Nothing happening? Move to hole two. Same thing. Then hole three. Come back to hole one if it produced, or push to a new location if none of them did. Success on trip one looks like five to eight fish. Could be one hole doing all the work, could be spread across all three. Either way — you caught fish through ice. That’s the whole point of trip one.
What to Bring (Physical Checklist)
Rod and reel, five-gallon bucket, hand auger, ice picks, line clippers, flashlight, thermos of hot coffee, snacks that won’t freeze solid, small tackle box with jigs and wax worms, spare gloves, hand warmers, fully charged phone. The spare gloves matter more than you expect. Everything gets wet eventually.

Stay in the loop
Get the latest fish blog updates delivered to your inbox.