Why Pier Fishing Is the Best Way to Start
Pier fishing has gotten complicated with all the conflicting advice flying around. Every article promises the “ultimate beginner guide,” then buries you in gear lists and technical jargon. As someone who fishes every weekend at a local coastal pier, I’ve learned everything there is to know about what actually matters for beginners — and what’s just noise. Today, I will share it all with you.
Here’s what most of those articles miss: you don’t need much, and the fish are already there. I’ve watched hundreds of people walk down my regular boardwalk convinced they need a $400 setup and some kind of secret knowledge. They don’t. Neither did I when I started.
The barrier to entry is genuinely low. No boat. No trailer. No gas money for a 40-mile drive to a boat ramp. You park, walk maybe fifty yards, and you’re fishing. Last month on a Saturday morning, I watched a 72-year-old woman catch her first flounder ever — using a $15 rod combo from a discount sporting goods store. First fish of her life. She was grinning like a kid.
Piers work because fish congregate around them. The structure creates habitat. Small baitfish hide in the pilings. Larger fish come hunting. This isn’t theory — it’s just ecosystems doing what ecosystems do. The fish don’t care if you’re a beginner. They’ll bite.
This article includes affiliate links. We may earn a commission at no extra cost to you.
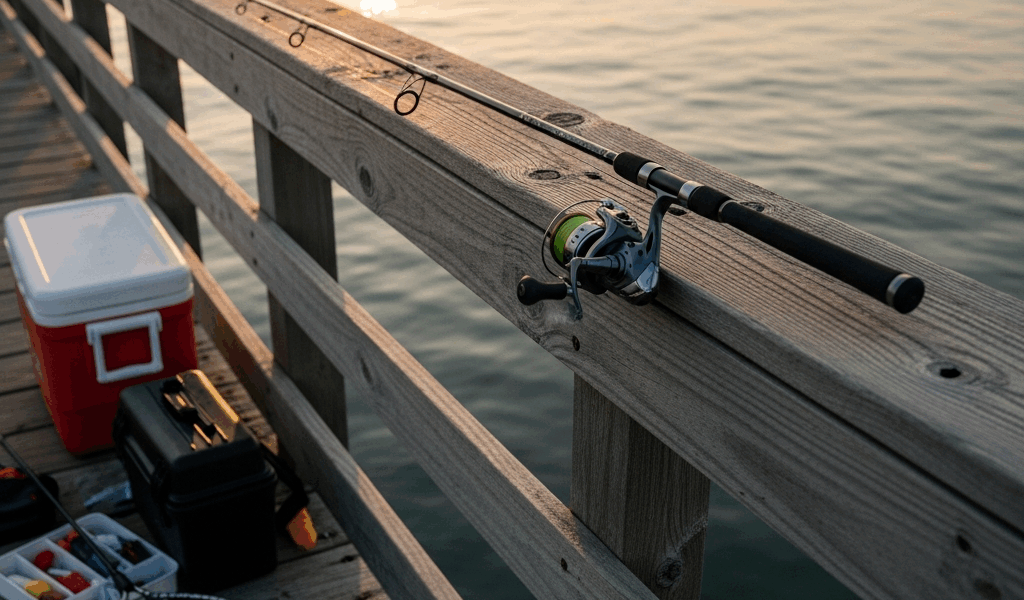
Essential Pier Fishing Gear — Under $100 Total
Probably should have opened with this section, honestly. Most beginners stress hard about cost. I spent $200 on my first setup because I didn’t know better. Don’t make my mistake.
Start with a rod and reel combo — $40 to $50 is the sweet spot. A Shakespeare Ugly Stik GX2 or a Shimano Sienna FE will do everything you need. Not fancy. Built to last. There’s a guy at my pier who’s been using the same Ugly Stik for three years straight. Catches fish constantly. That’s your benchmark right there.
Get 8-pound to 12-pound monofilament line. A 100-yard spool runs $3 to $5. I’m apparently rough on line — I snap rigs on pilings, lose hooks to sharp shells, occasionally cut myself being careless — so I burn through it faster than most. Keep two spools in your tackle box regardless.
Your tackle box needs basics:
- Assorted hooks in sizes 1/0, 2/0, and 3/0
- Small barrel swivels to prevent line twist
- Split shot sinkers in various weights
- A handful of floats or bobbers
- Wire cutters or old scissors
- A small flashlight
All of that runs $15 to $20 at any tackle shop. Don’t buy a hundred hooks. Ten of each size and refill as needed — that’s the move.
Bait is your biggest variable. Fresh shrimp costs $6 to $8 per pound. Mullet runs around $12. Squid sits at $5 to $7. A pound of shrimp gives you 40 to 50 individual baits depending on size. That covers a full day of fishing, easy.
Polarized sunglasses might be the best option here, as pier fishing requires reading the water constantly. That’s because you’ll spot feeding fish, see baitfish schooling near the pilings, notice current shifts. $20 to $30 and your success rate jumps immediately. This one’s non-negotiable.
Everything listed above totals $80 to $90. You’re ready to fish.
What You Can Catch from a Pier
Species vary wildly depending on geography and season. Atlantic piers produce different fish than Gulf Coast piers. Pacific piers are different again.
On the Atlantic side, you’re looking at Spanish mackerel, Atlantic mackerel, croaker, spottail bass, sheepshead, and flounder. Summer means mackerel dominate. They’re aggressive, fast, and genuinely exciting on light tackle — a mackerel hits hard, your drag screams, and you’re suddenly not bored anymore. That’s what makes mackerel season endearing to us pier fishing regulars.
Gulf Coast piers yield redfish, spotted seatrout, Spanish mackerel, and pompano. Pacific piers produce rockfish, perch, lingcod, and cabezon depending on location.
Basic Pier Fishing Technique
Two primary rigs work on piers: the bottom rig and the float rig. Which one you use depends on your target species and water depth.
A bottom rig keeps bait on the seafloor where bottom feeders hunt. Tie a barrel swivel to your main line. Attach 18 inches of lighter leader to the swivel. Tie your hook to the end. Add a split shot sinker 18 inches above the swivel to pin everything down. This is your setup for flounder, sheepshead, and croaker.
A float rig suspends bait at a specific depth for midwater species. Tie a small bobber to your line. Attach 8 to 12 inches of leader below the float. Tie your hook to the end of the leader. Works for mackerel, seatrout, and active feeders near the surface.
Casting technique matters more than beginners expect. Hold the rod at waist level. Use your wrist to accelerate — not your shoulder. Release the line with your index finger at the peak of forward motion. Practice this ten times before you ever walk onto a pier.


Stay in the loop
Get the latest fish blog updates delivered to your inbox.